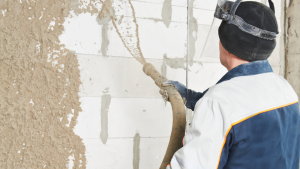
Stucco has long been favored for its strength, versatility, and timeless appeal as an exterior finish. Whether you’re embarking on a new construction project or considering a stucco renovation, understanding the application process is key to achieving a flawless finish. In this article, we’ll break down the steps involved in applying stucco and provide you with valuable tips and detailed directions to help you successfully complete your stucco project.
Step 1: Surface Preparation
Proper surface preparation is crucial for ensuring optimal adhesion of the stucco. Follow these key steps:
- Clean the Surface: Thoroughly clean the surface using a pressure washer or wire brush to remove any dirt, debris, loose paint, or previous coatings. This creates a clean and smooth base for the stucco application.
- Repair Damaged Areas: Inspect the surface for cracks, holes, or other damage. Repair them using a suitable patching compound and allow it to dry completely before moving on to the next step.
- Apply a Bonding Agent: To enhance adhesion between the existing surface and the stucco, apply a bonding agent as per the manufacturer’s instructions. This step ensures a strong and long-lasting stucco finish.
Step 2: Scratch Coat Application
The scratch coat is the first layer of stucco that provides a rough surface for the subsequent layers to adhere to. Follow these steps for a successful scratch coat application:
- Mix the Stucco: Follow the manufacturer’s instructions to mix the stucco to the right consistency. Proper mixing ensures a uniform and workable material for application.
- Moisten the Substrate: Lightly dampen the prepared surface with water just before applying the scratch coat. This helps prevent premature drying of the stucco and improves the bond between the scratch coat and the substrate.
- Apply the Scratch Coat: Use a trowel to apply the scratch coat evenly to the surface. Aim for a thickness of approximately 3/8 to 1/2 inch. After applying the stucco, create horizontal scratch marks using a scratcher or trowel. These marks enhance adhesion for the next layer.
Step 3: Brown Coat Application
The brown coat is the second layer of stucco that adds thickness and acts as a leveling layer. Follow these steps for a flawless brown coat application:
- Prepare the Stucco Mixture: Mix the stucco with the appropriate amount of sand, cement, and water, following the manufacturer’s guidelines. Consistency is key to achieving a smooth and workable brown coat.
- Moisten the Scratch Coat: Lightly moisten the scratch coat with water before applying the brown coat. This moist surface promotes a strong bond between the layers and minimizes the risk of cracking.
- Apply the Brown Coat: Use a trowel to apply the brown coat evenly to the scratch coat. Aim for a thickness of approximately 3/8 inch. While applying, level the surface using straight edges and floats to achieve a smooth and even finish. Take care not to overwork the stucco, as it may affect the final texture.
Step 4: Finish Coat Application
The finish coat is the final layer of stucco that provides the desired texture, color, and aesthetic appeal. Here’s how to apply the finish coat:
- Mix the Finish Coat: Follow the manufacturer’s instructions to mix the finish coat stucco mixture, adding the desired color pigment. The finish coat allows for personalization and enhances the overall appearance of your stucco finish.
- Moisten the Brown Coat: Lightly dampen the brown coat with water before applying the finish coat. This moisture helps achieve a proper bond between the layers and prevents rapid drying of the finish coat.
- Apply the Finish Coat: Use a trowel or sprayer to apply the finish coat evenly to the brown coat. Work in small sections, focusing on achieving the desired texture and thickness. Whether you prefer a smooth finish, dash finish, or textured finish, apply the stucco using appropriate techniques to create the desired look.
Step 5: Curing and Maintenance
Proper curing and maintenance are essential for the longevity of the stucco finish. Follow these guidelines:
- Curing: Keep the newly applied stucco moist by periodically misting it with water for several days. This allows for proper curing and minimizes the risk of cracking. Avoid excessive moisture, as it can lead to improper curing and affect the stucco’s performance.
- Protection: Protect the stucco from excessive moisture and extreme weather conditions during the curing process. Use appropriate coverings or temporary barriers to shield the stucco until it has fully cured.
- Maintenance: Regularly inspect the stucco for any cracks, damage, or signs of wear. Address any issues promptly to prevent further damage. Additionally, periodically clean the stucco using mild detergent and water to remove dirt or stains.
By following this step-by-step guide, you can confidently navigate the stucco application process and achieve a flawless finish for your construction or renovation project. Proper surface preparation, application of the scratch coat, brown coat, and finish coat, along with careful curing and maintenance, are essential for a successful stucco project that enhances the beauty and durability of your property. If you feel uncertain about any aspect of the stucco application process, it is recommended to consult with a professional stucco contractor who can provide expert guidance and ensure a flawless finish.


